Depth-of-field explained
 The way a subject is reproduced in a photograph can be very different from how it looked to you as you took the picture. When you cast your eye over a scene, everything in it seems more or less equally sharp, but sometimes in the finished shot only part of the subject appears acceptably sharp. The way a subject is reproduced in a photograph can be very different from how it looked to you as you took the picture. When you cast your eye over a scene, everything in it seems more or less equally sharp, but sometimes in the finished shot only part of the subject appears acceptably sharp.This zone of sharpness is called the depth-of-field, and it extends in front of and behind the point that you actually focused on. The size of the zone is determined by three key factors - the aperture of the lens, the focal length of the lens used, and the distance you are from the subject. Varying these three elements allows you almost complete control over the depth-of-field in a picture. When most of the picture is sharp, we say there's lots of depth-of-field. When only part is sharp, we say depth-of-field is limited. As we'll see later, whether you go for extensive or limited depth-of-field depends upon the subject matter and how you want to depict it. |
| Three main factors that can be used to control depth-of-field |
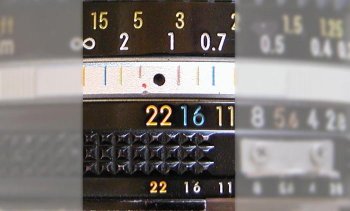
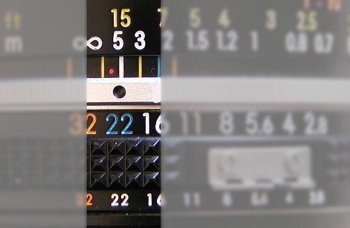
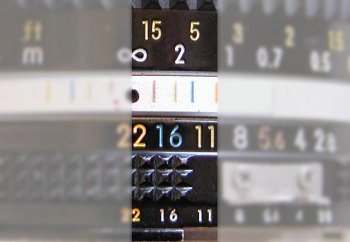
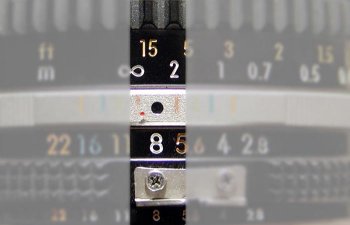  Excuse the state of this old Nikon lens, but it helps to show what we're talking about and by blurring the surrounding area it's easy to show the scale and depth of field. Look at the picture with the lens set to f/22. At this setting the lens will ensure everything from infinity (the symbol that looks like a figure eight on its side) to two feet is sharp. With the lens set to f/8 the zone of sharpness is reduced to infinity to just over five feet. |
| 2 The focal length of the lens. |
   Here I've illustrated the affect of using a different focal length. A Nikon 28mm wide angle at f/22 would as we've seen give a sharp result from two feet to infinity; a 55mm Micro Nikkor from seven feet to infinity and a 105mm Nikkor from about 28 feet to infinity . |
| 3 The Camera-to-Subject Distance For various technical reasons, the closer you get to the subject the more limited the depth becomes. In fact, when shooting close-up subjects it can extend to just a few millimeters in front of and behind the subject. So that's the theory, but what does it all mean in practical picture-taking terms? |
| Four common techniques using depth-of-field |
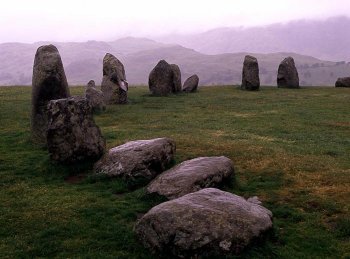 A small aperture was used to ensure the foreground stones were as sharp as the ones in the distance. |
| You can guess the hyperfocal focusing distance, but life is much easier if your lens is marked with a depth-of-field scale. This used to be regarded as an essential feature, but with the development of wide-ranging zooms many manufacturers now omit one. If you do have such a scale, simply line up the infinity mark against the mark for the aperture you've set and, although the image in the viewfinder will look out-of-focus, the finished image will be sharp from front to back. |
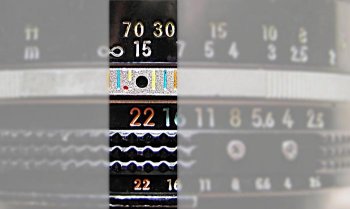
 If you focus on infinity all the potential sharpness beyond infinity is wasted and the closest zone of focus, on this 28mm example, is about four feet. 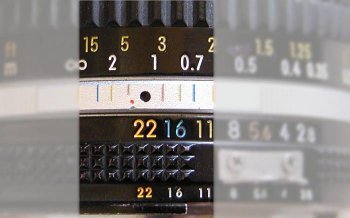 Adjust the lens so that the infinity setting is on the marking of the aperture you have selected to extend the zone of sharpness to about two feet. |
| 2 Main subject sharp with background completely out-of-focus. There are some subjects where you want the main subject to stand out strongly from an out-of-focus background. Portraiture, where the emphasis is on the person, rather than the location, is probably the most popular area. What you need here is a use a telephoto lens at its widest aperture. It's also worth moving the subject as far away as possible from the background - in cramped studio situations this is often impossible but outside against a wall or foliage it's usually easier. Take care, though, that you focus accurately, as the limited depth-of-field will be unforgiving of any focusing errors. For portraits focus on the eye for the best results. |
 Plants often have distracting backgrounds so focusing on the flower head and throwing the background out is a common technique used to isolate the subject. |
| 3 Main subject sharp, with background out-of-focus but still recognisable. Sometimes throwing the background completely out-of-focus is going too far. You want to show the subject in its natural environment, but with the background toned down to it doesn't compete for attention. A person on the beach, for instance, an animal in the zoo, or a flower in a garden. Here a standard to short telephoto lens, somewhere from 50mm to 135mm, is ideal - especially if it's coupled with a middle range aperture of around f/8. |
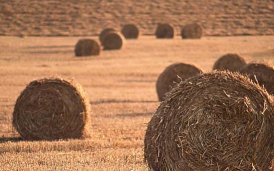 In this shot of hay the background has been deliberately pushed out of focus but not by too much so that it is still obvious what it is. |
| 4 Zone of sharpness deliberately limited. Occasionally you may want to limit the depth-of-field to a very specific zone. Maybe in a portrait you want just the eyes in focus, and not even the ears or the tip of the nose. Here, once again, a depth-of-field scale on the lens helps, or, failing that a depth-of-field preview facility on the camera, This will give a visual indication of what will and won't be in focus by manually stopping down the lens. |
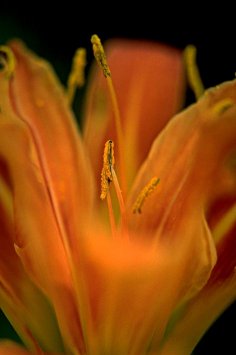 A technique used by many flower photographers is to really limit the depth of field. Here just the stamen is sharp making the foreground and background petal really soft. |
| Summary |
I want to shoot with a narrow depth of field. So, I add a telephoto lens to my camera but now to get my subject in the viewfinder, I have to stand about 50 feet away. Can I add a wide angle lens in front of the telephoto lens so I don't have to stand so far away?
Thank you for your comments.
DavidQuest
Add your message
Please login here or if you've not registered, you can register here. Registering is safe, quick and free.
photodo Stats
428 MTF tests
74 in-depth photodo reviews
100+ users join each day
Help the lens community by reviewing or rating a lens today via our lens search

Latest Lens Reviews
- Chinon 28mm f/2.8 Vintage Lens Review
- Canon EF 70-200mm f/4L IS II USM Lens Review
- Samyang AF 85mm f/1.4 EF Review
- Sigma 70mm f/2.8 DG Macro Art Review
- Samyang AF 24mm f/2.8 FE Review
- Meike 50mm f/1.7 Review
- Tamron 70-210mm f/4 Di VC USD Review
- Lensbaby Burnside 35mm f/2.8 Review
- Asahi Super Takumar 50mm f/1.4 Review
- Asahi Super-Multi-Coated Takumar 135mm f/3.5 Review